Creator, Gamer, and Enthusiast of Art & Photography | Crafting Worlds with Unreal Engine, Core Games, and Beyond | Embracing the Swishy Side of Life! | Drawing Life as I go🎮🎨✨
When I have a house . . . as I sometime may . . .
I’ll suit my fancy in every way.
I’ll fill it with things that have caught my eye
In drifting from Iceland to Molokai.
It won’t be correct or in period style,
But . . . oh, I’ve thought for a long, long while
Of all the corners and all the nooks,
Of all the bookshelves and all the books,
The great big table, the deep soft chairs,
And the Chinese rug at the foot of the stairs
(It’s an old, old rug from far Chow Wan
That a Chinese princess once walked on).
My house will stand on the side of a hill
By a slow, broad river, deep and still,
With a tall lone pine on guard nearby
Where the birds can sing and the storm winds cry.
A flagstone walk, with lazy curves,
Will lead to the door where a Pan’s head serves
As a knocker there, like a vibrant drum,
To let me know that a friend has come,
And the door will squeak as I swing it wide
To welcome you to the cheer inside.
For I’ll have good friends who can sit and chat
Or simply sit, when it comes to that,
By the fireplace where the fir logs blaze
And the smoke rolls up in a weaving haze.
I’ll want a wood box, scarred and rough
For leaves and bark and odorous stuff,
Like resinous knots and cones and gums,
To toss on the flames when winter comes.
And I hope a cricket will stay around,
For I love it’s creaky lonesome sound.
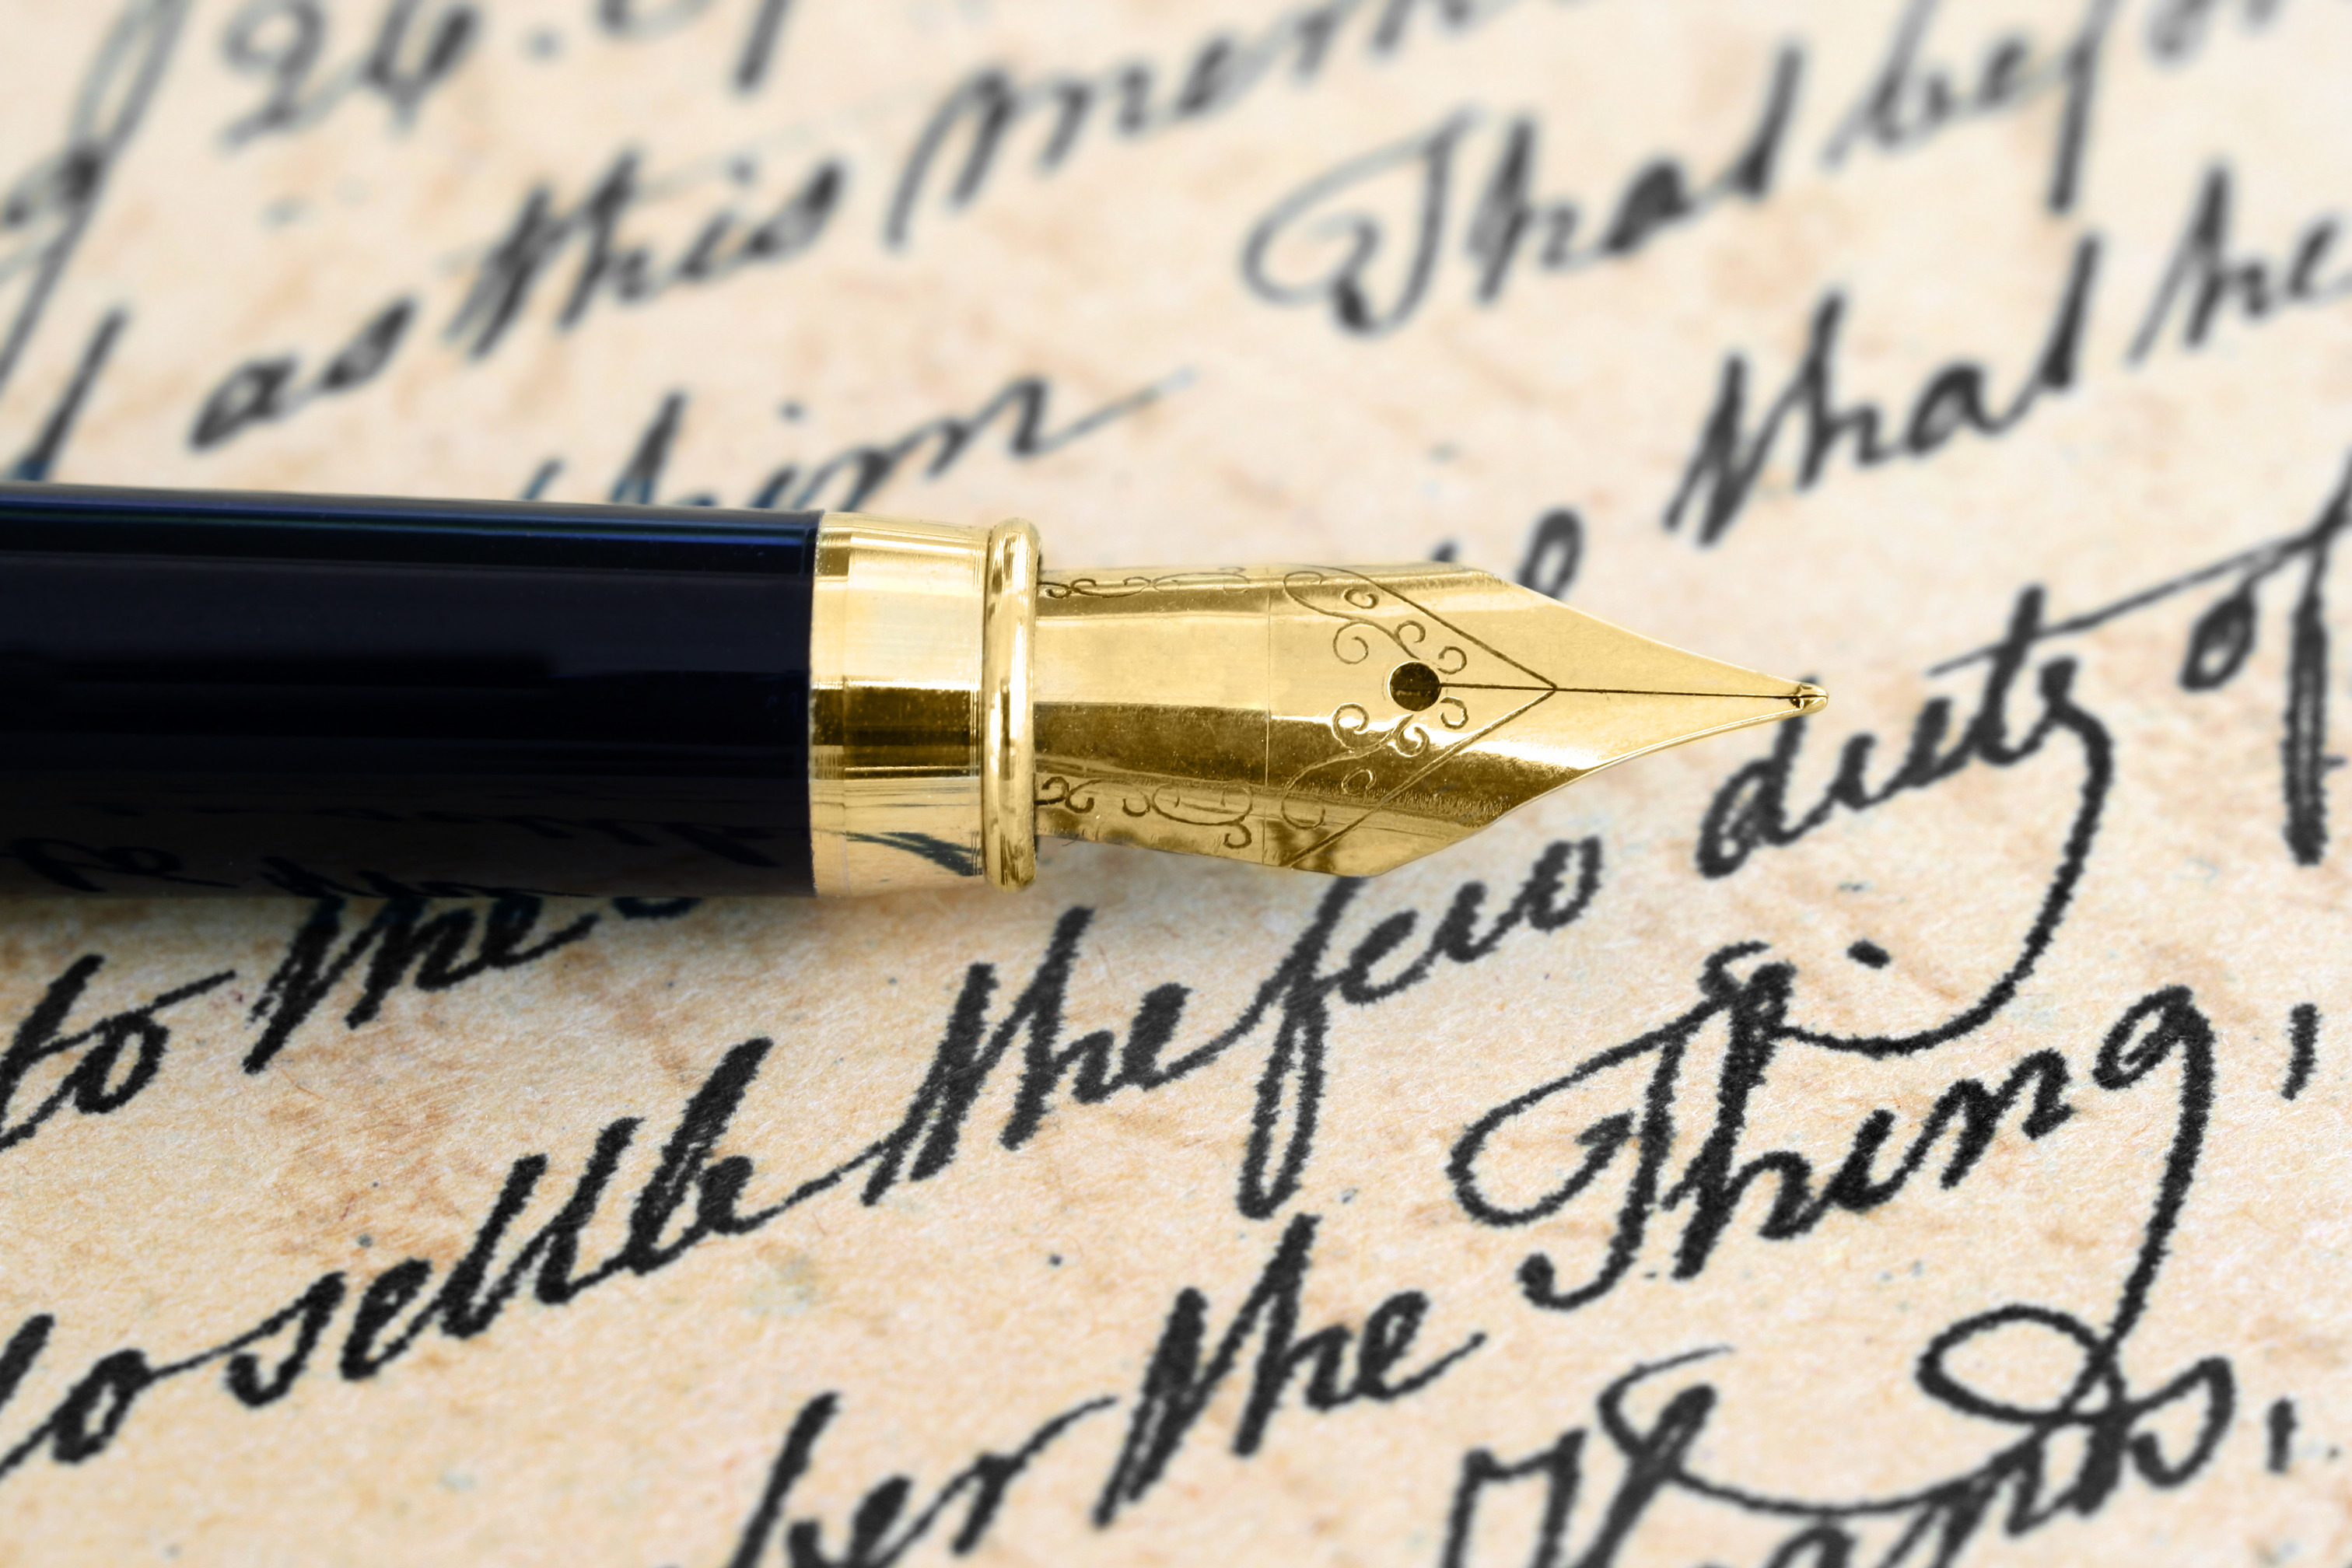
With the advancement of technology, the art of letter writing with a pen and paper is dwindling fast but a few of us are still trying to keep the tradition alive.
Are you fed up of only receiving bills and junk mail in your mailbox? It’s always nice to receive a surprise card or letter that has been handwritten instead of the boring stuff that you’re not really interested in, so why not surprise someone by putting pen to paper.
I’m in a small group of six people who send a Round Robin of handwritten letters that has been going on for about a year now. It’s fun and I don’t just get one letter to read but five.
How does it work?
Person number one writes a letter (maximum two pages) about anything they like – what they have been doing since receiving the last letter, any vacations they are planning or have been on, hobbies they do, book recommendations, recipes etc. They then send it to the second person on the list.
When the second person has received the envelope they write their letter, read person one’s letter and then add their letter to the original and post both letters to person number three.
Mail all the letters you have received, adding your own to the envelope and then wait for it to come back to you.
Person number three then reads both letters in the envelope, writes their letter and adds it to the envelope. Three letters now wing their way onto person number four. Person number four does the same and sends all the letters on to person number five and so it continues until all the people in the group have received, read and written letters.
Once a letter has been received by a recipient they have up to two weeks to read and respond with their own letter. There’s usually a sheet of everyone’s addresses so each person knows who they need to send the complete package to. This should always stay in the envelope as a reference sheet. Any changes can be made to the address list should anyone move home during the round of letters.
Once all the letters have been sent back to the very first person in the group, they remove their first letter, read all the letters they have not yet seen and then add a completely new letter to the package. They then send it on to person two who removes their letter and adds a new one. This continues round and around until it completes a second journey and the whole process starts again. This way of sending letters is often called a Round Robin.
As you get to see your original letter you can then re-read what you wrote to everyone so you don’t forget or repeat yourself.
Why not give the art of letter writing a try and spice up someone’s mailbox. You’ll give them a nice surprise as they won’t be expecting it – especially when it’s hiding in with the junk mail and you may even inspire them to put pen to paper and write back to you which will cheer up your mailbox too.
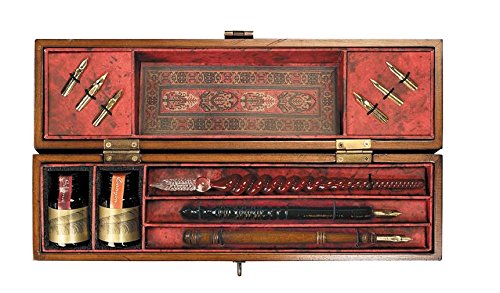
Make it even more fun and interesting by investing in a writing set
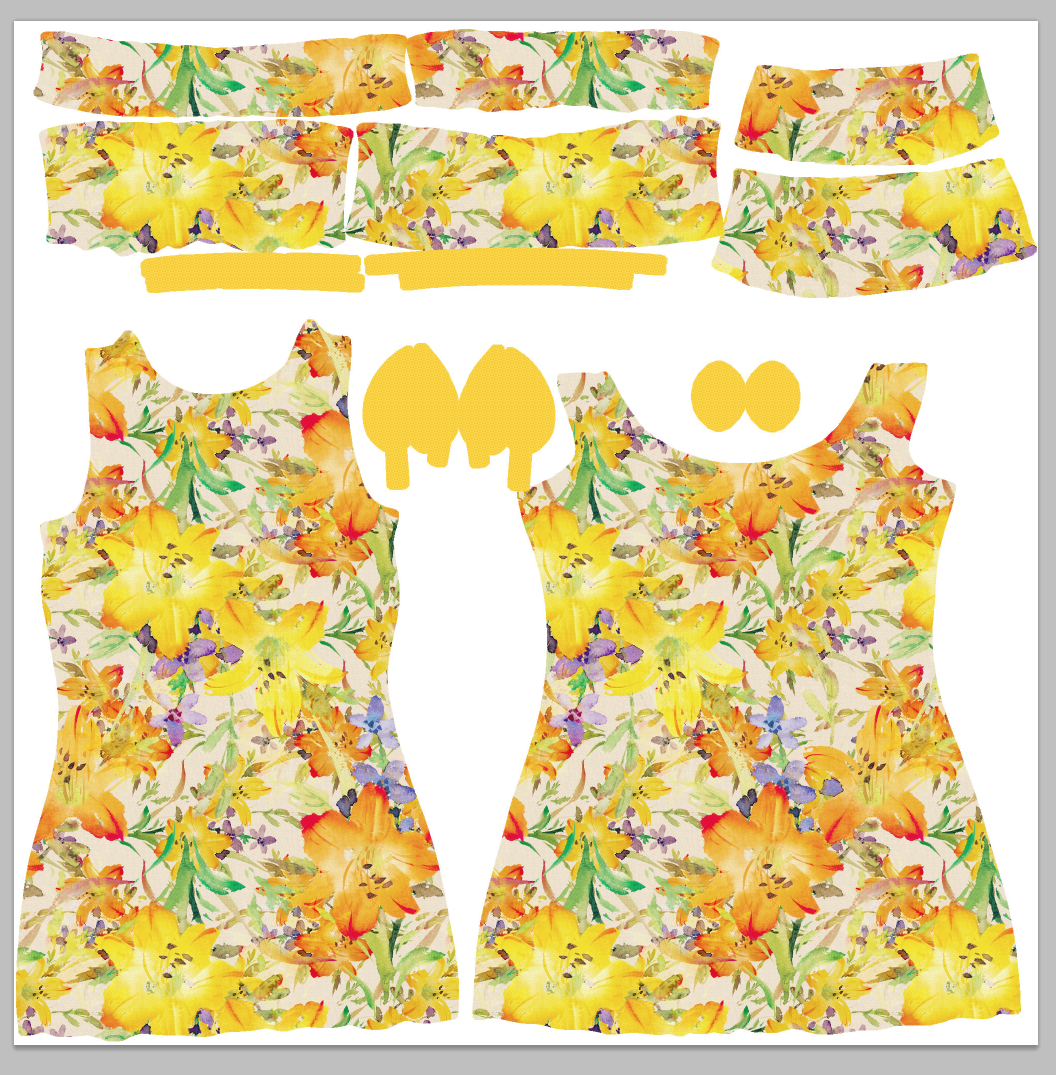
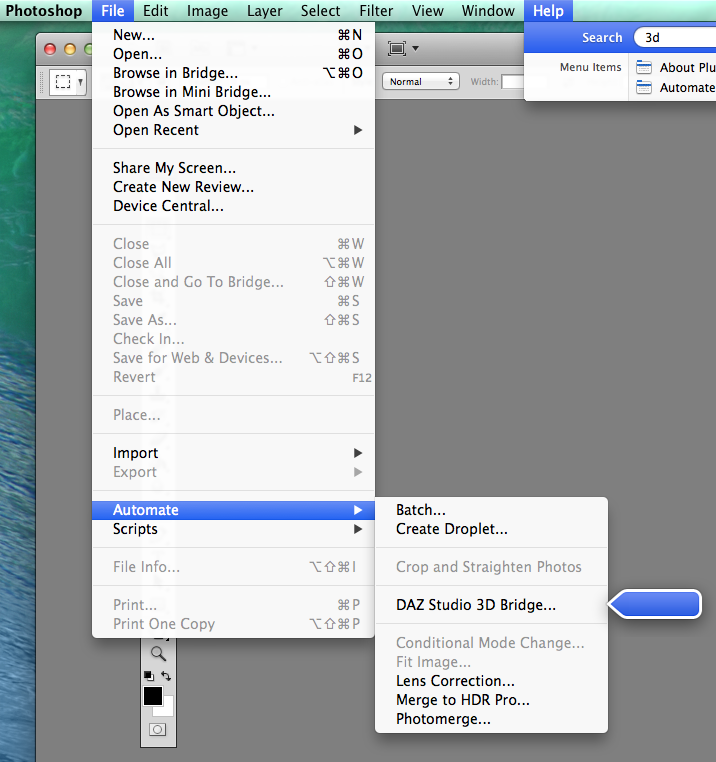
There is an easy way to transfer image maps to Photoshop so that you can add your own textures or patterns to an item of clothing by using the 3D Bridge Camera available within DAZ Studio.
Open DAZ Studio and click on the Wardrobe tab. Select the item of clothing and add to the scene. Click on File → Initialize 3D Photoshop Bridge. This should add the Bridge to your scene panel.
Open Photoshop, and if you haven’t already done so, create a new workspace. Then select File → Automate → Daz Studio 3D Bridge.
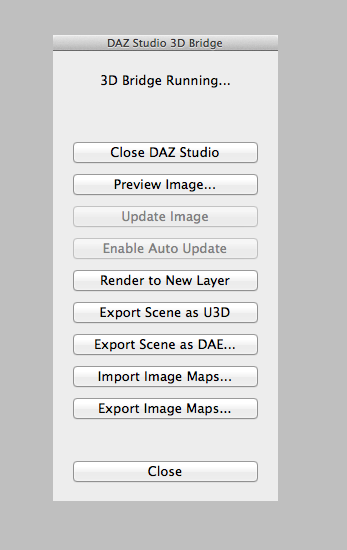
Open the 3D Bridge in Photoshop so that you can import and export image maps from DAZStudio
This will then open the following dialog box
The 3D Bridge in Photoshop allows you to import and export image maps as well as scenes.
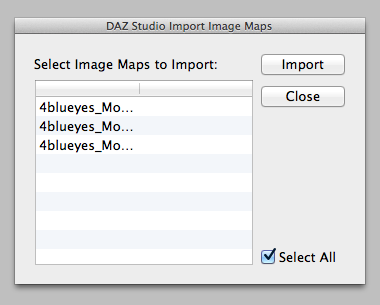
Double check that you have an item of clothing open in a scene in DAZ Studio and then click Import Image Maps in Photoshop. A dialog box will pop up showing the available image maps that you are able to import from DAZ Studio.
Select image maps to import
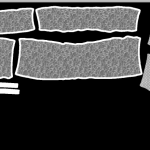
If you are happy to import all the image maps shown then leave the Select All box ticked. This will then import your image maps into your new Photoshop document. If you untick the box you can select which files you wish to import manually. After you click the Import button you should see something similar to this in Photoshop:-
The image map with the original pattern on the outfit
The bump map
The transparency
Depending on how many image maps you selected will depend on how many files are imported into Photoshop. It is important to do this step with only the item of clothing in DAZ Studio or the 3D Bridge will import everything in the scene and it will be harder to select what you need from the import menu.
Now you can add your own pattern or texture to the item of clothing. You can find out how to do that in my article Making Textures for 3D Models
Once you are happy with your textures click on export image maps and your new pattern will appear on the clothing back in DAZ Studio.
Now you can continue building your scene in DAZ Studio, add a figure and see what your new creation looks like.
Now you know how to use the 3D Bridge Camera in DAZ Studio and Photoshop – what are you going to make?
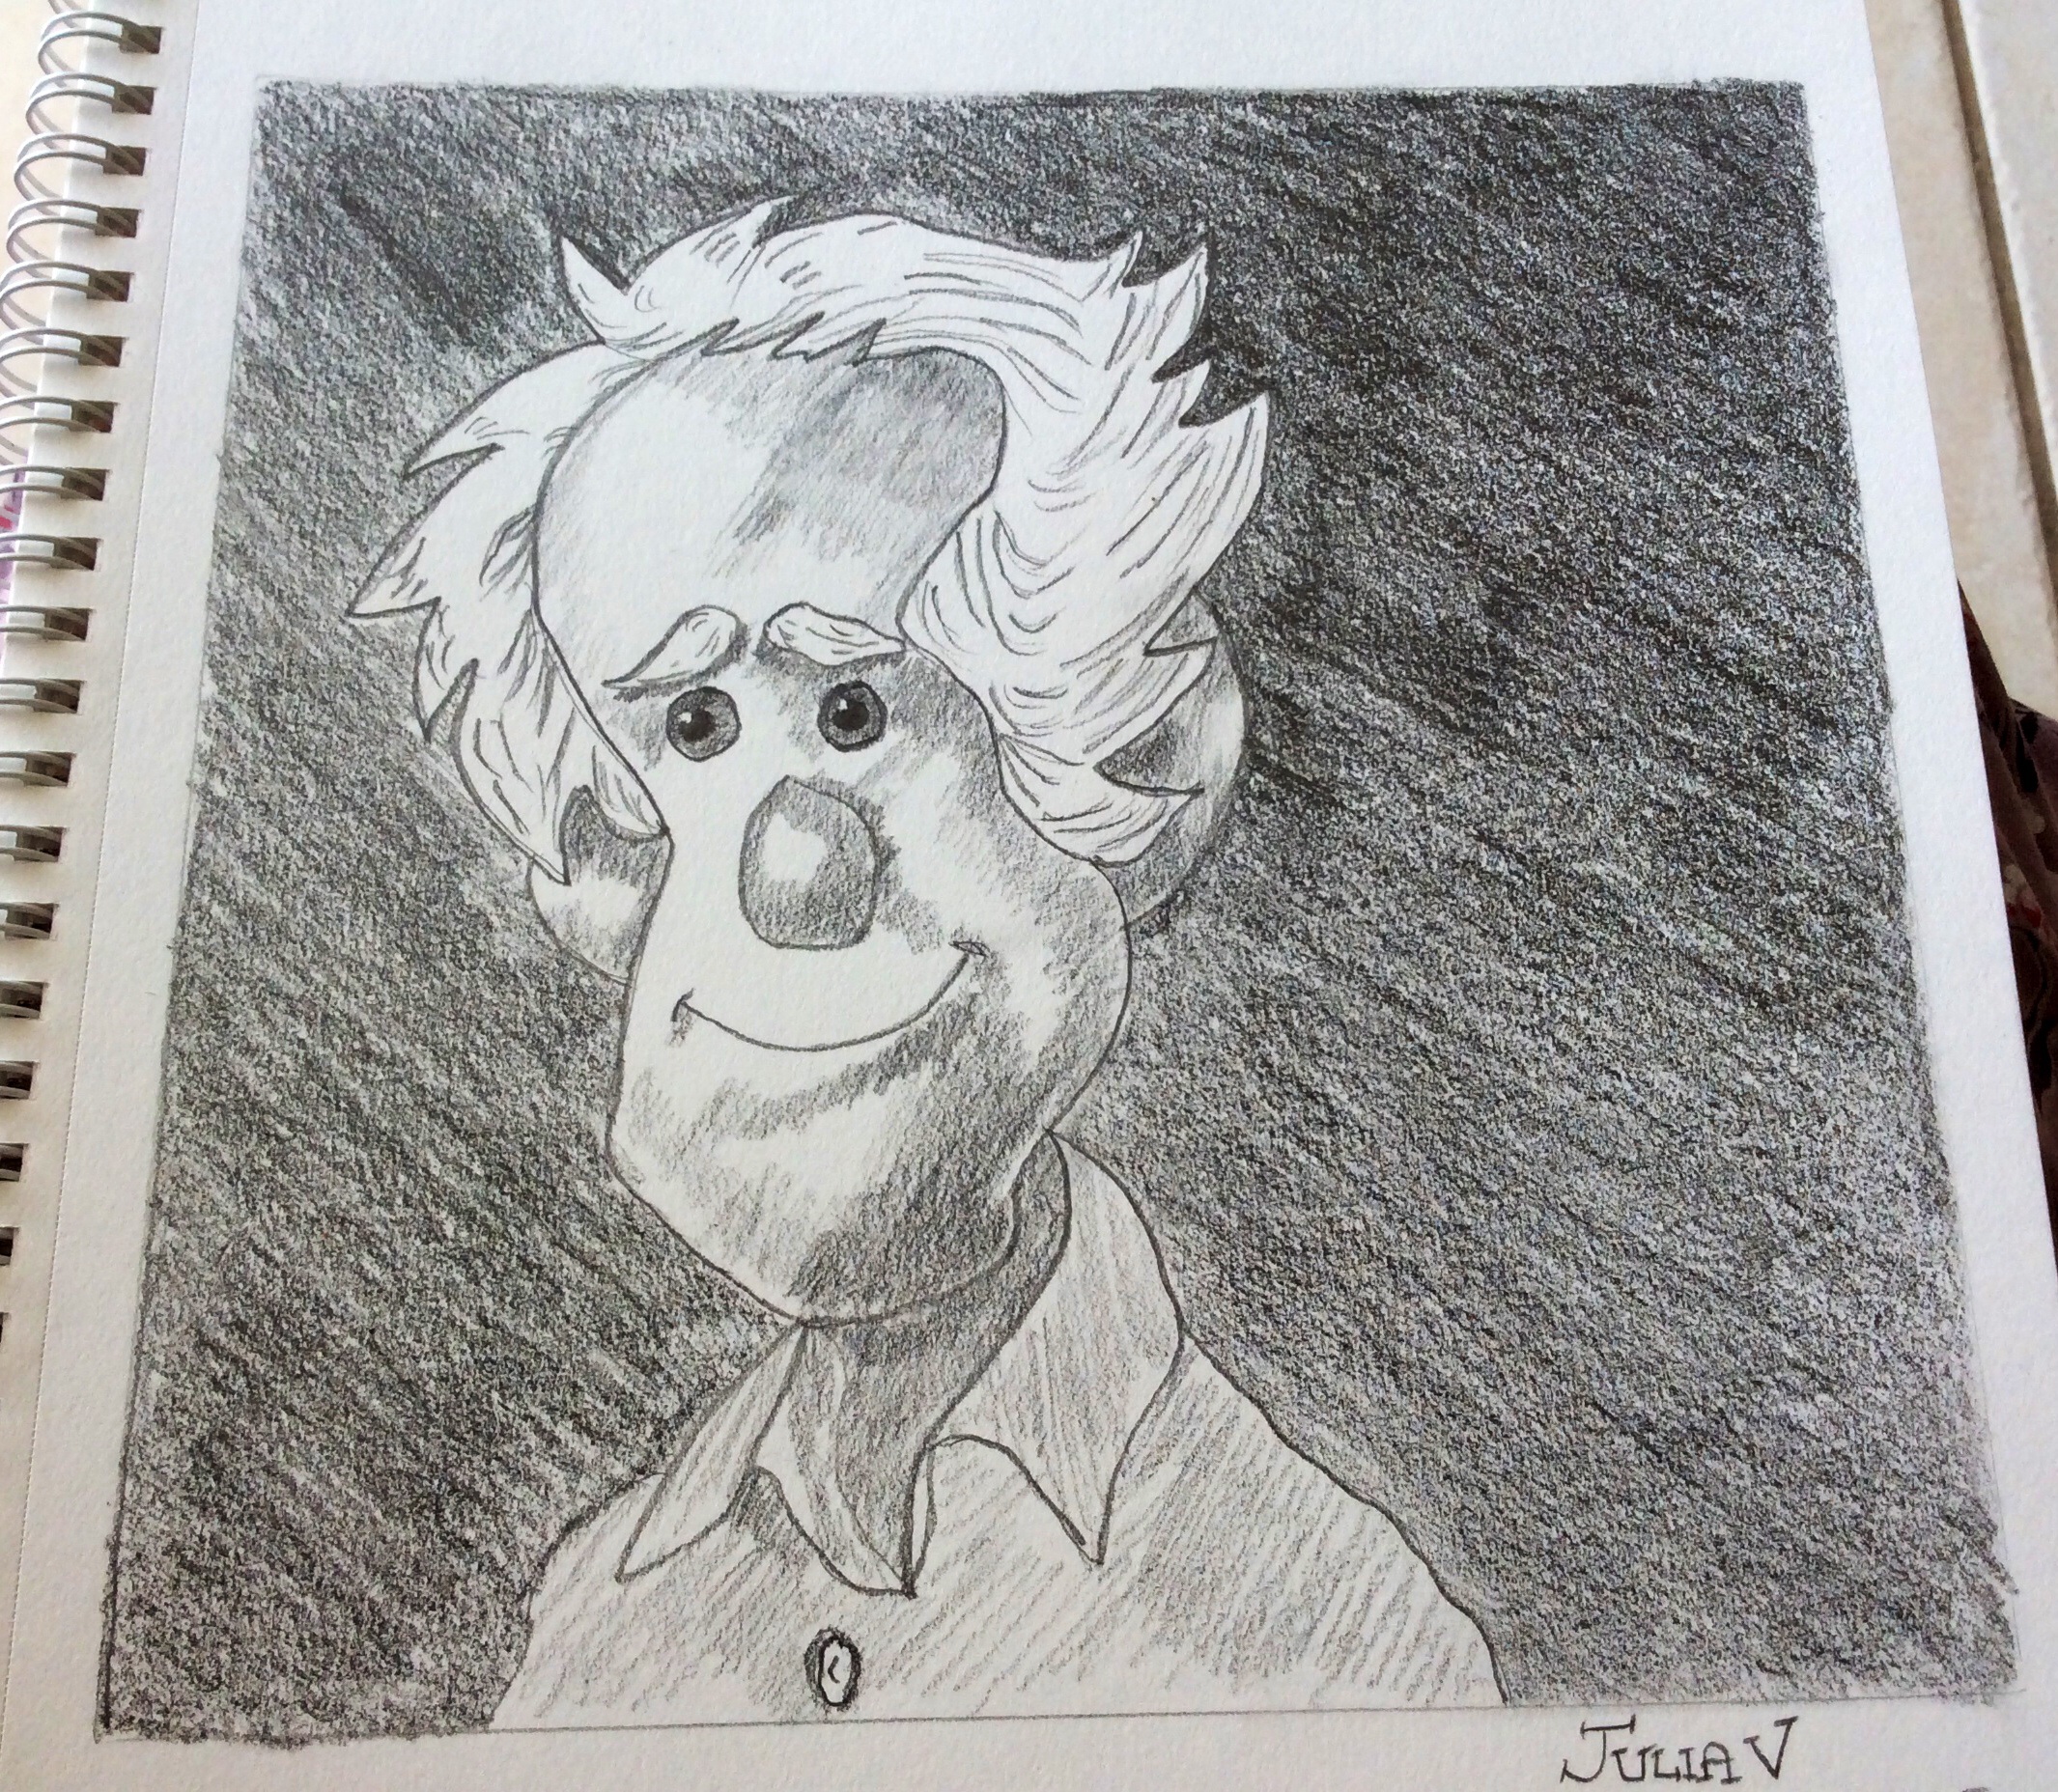
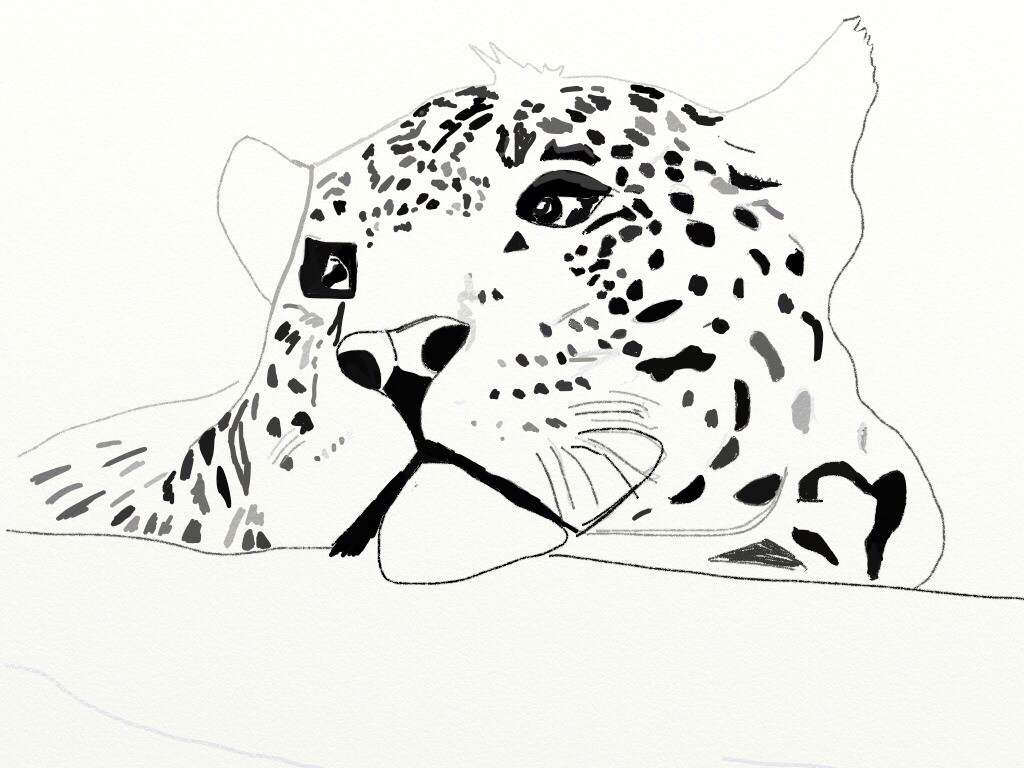
For this Sunday Sketch I drew a caricature style figure and again looked at various shading and hatching techniques.
For this sketch I used the following:-
Different grades of graphite pencils: 2H, HB, 2B, 4B and 6B
Strathmore Windpower Drawing Sketchbook
a kneaded eraser
pencil sharpener
First of all draw a square on your sketchpad as a border. This will help contain the drawing area and make it easier to keep the proportions aligned well for your caricature to sit and to help you shade the background easier.
Next with an HB pencil lightly sketch the outline of the hair. Add outlines to show the position of the ears. At the midway point add eyebrows and eyes.
Lightly sketch in the nose and mouth.
Outline the neck, the collar of the shirt and the shirt.
Before continuing check that you are happy with the position of all elements and amend anything using the eraser.
Now it’s time to add the shading using various pencils, such as HB, 2B, and 4B. For example, an HB makes lighter lines than 2B or 4B.
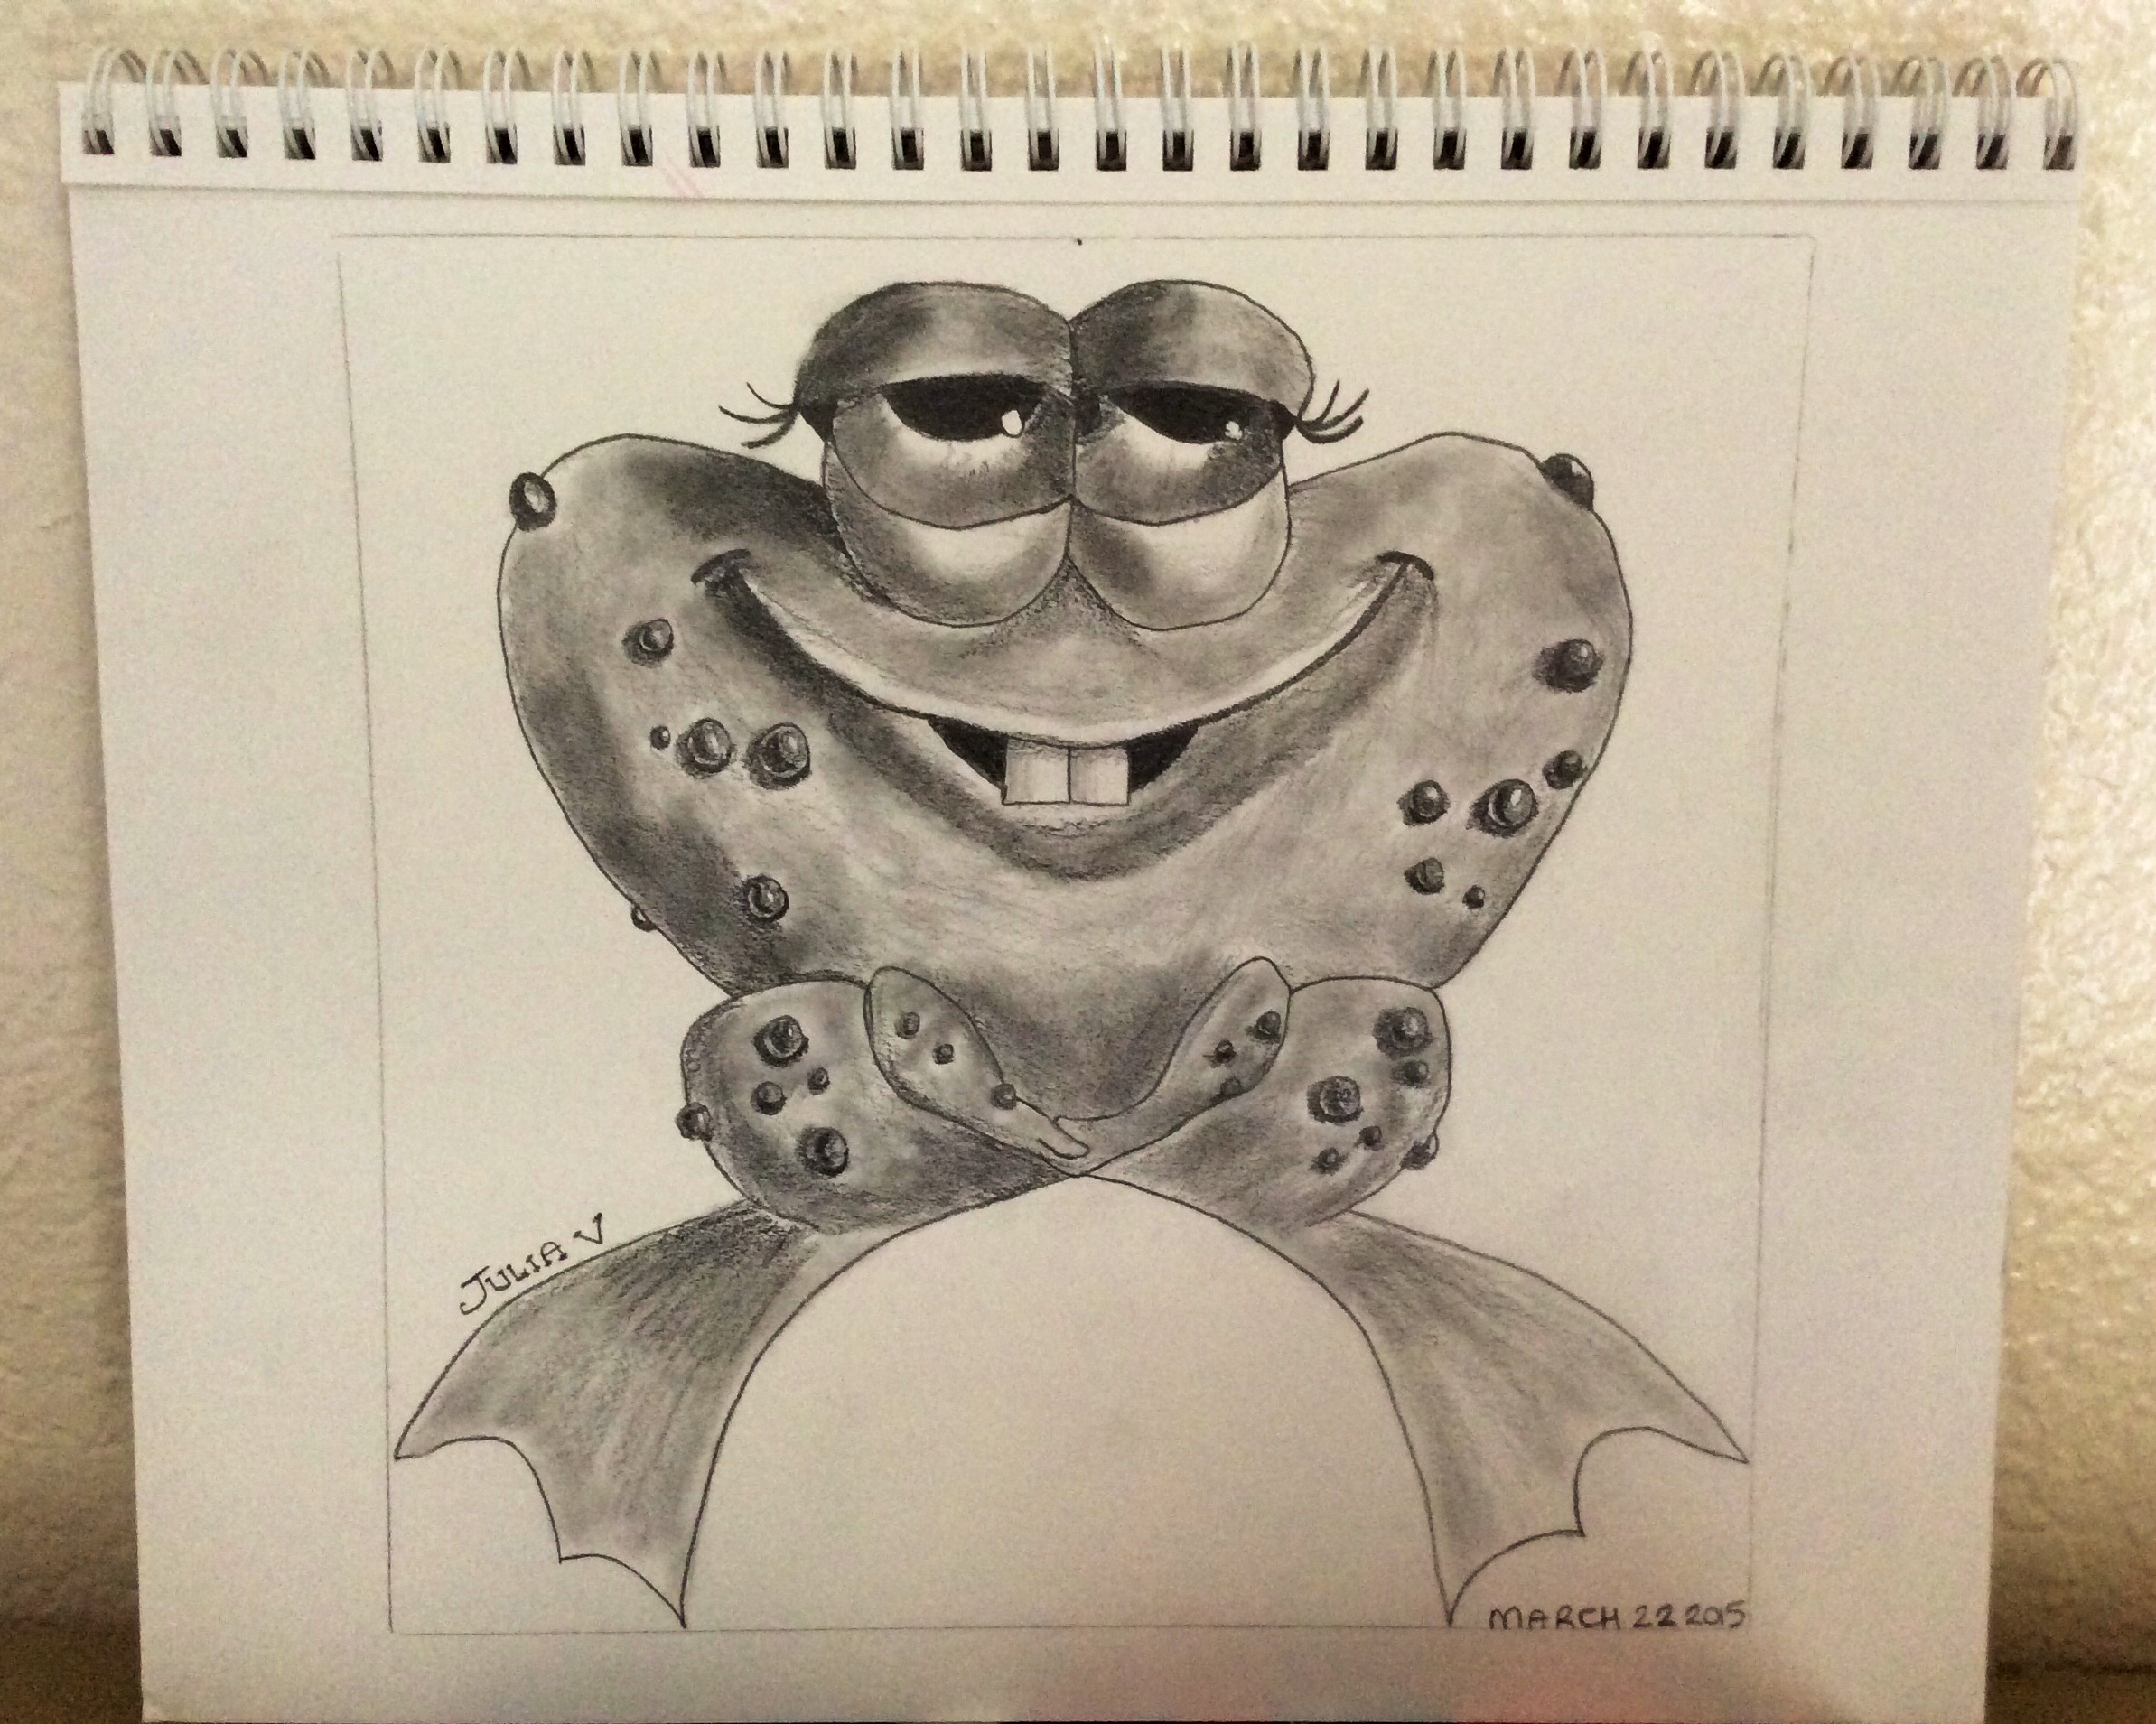
As part of my new feature series, Sketch Sunday, I will sketch a new drawing and explain how I made it. My first sketch is a comical looking frog.
For this sketch I used the following:-
Different grades of graphite pencils: 2H, HB, 2B, 4B and 6B
Strathmore Windpower Drawing Sketchbook
a kneaded eraser
pencil sharpener
Q-tip
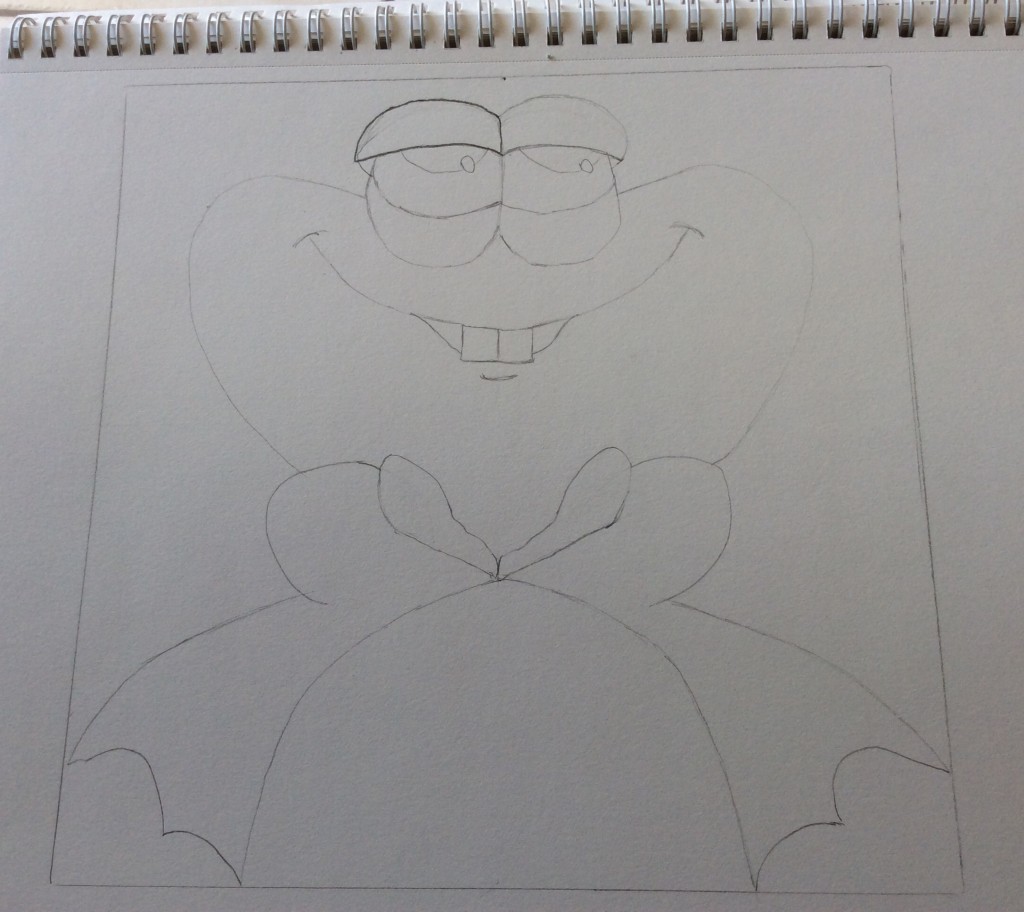
First I drew a square box on the paper to help contain the proportions of my sketch. I then drew a dividing line down the center as an aid to get the symmetry of the frog on either side.
I then drew the top half of his face and body and a couple of lines to mark where the legs and feet would go.
Roughly sketch the outline of the frog using a H pencil.
Two ovals become eyes. A slight curved line becomes a mouth with a couple of goofy teeth. I then erased all the guide lines and center marks so I was left with a plain frog sketch.
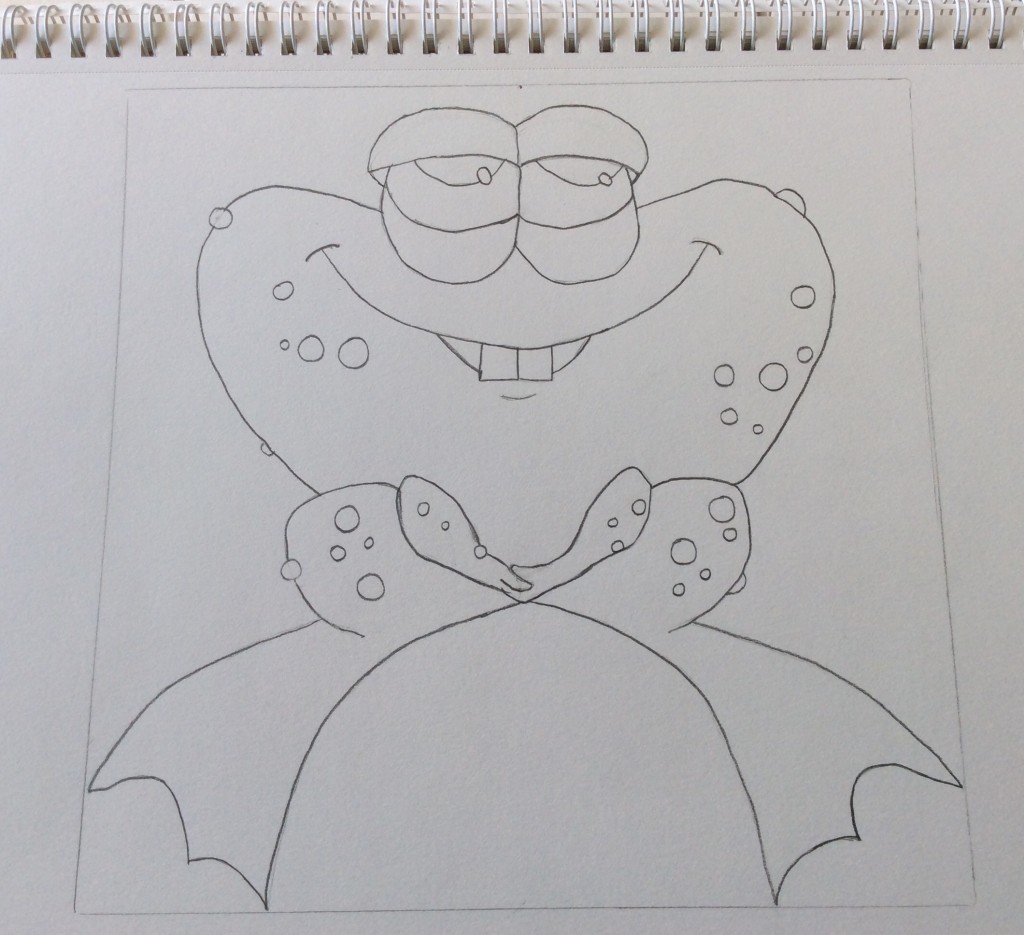
Next I used a 2B pencil to make some neat thin dark lines around the eyes, mouth and teeth. I then added some circles of different sizes that would become warts over his body. I finished off marking up the rest of the drawing with thin dark lines.
With a 2B pencil define the frog outline with a nice dark edge and add some different size circles to make warts on his upper body.
Next up is shading. First of all I used a HB pencil and added light shading to the frogs eyes, body, legs and feet. As I was shading I followed the contours of the lines, for example the curves in the eyelids. I continued in the same manner across the body and the legs with the darker shadows on the left and the lighter shadows on the right.
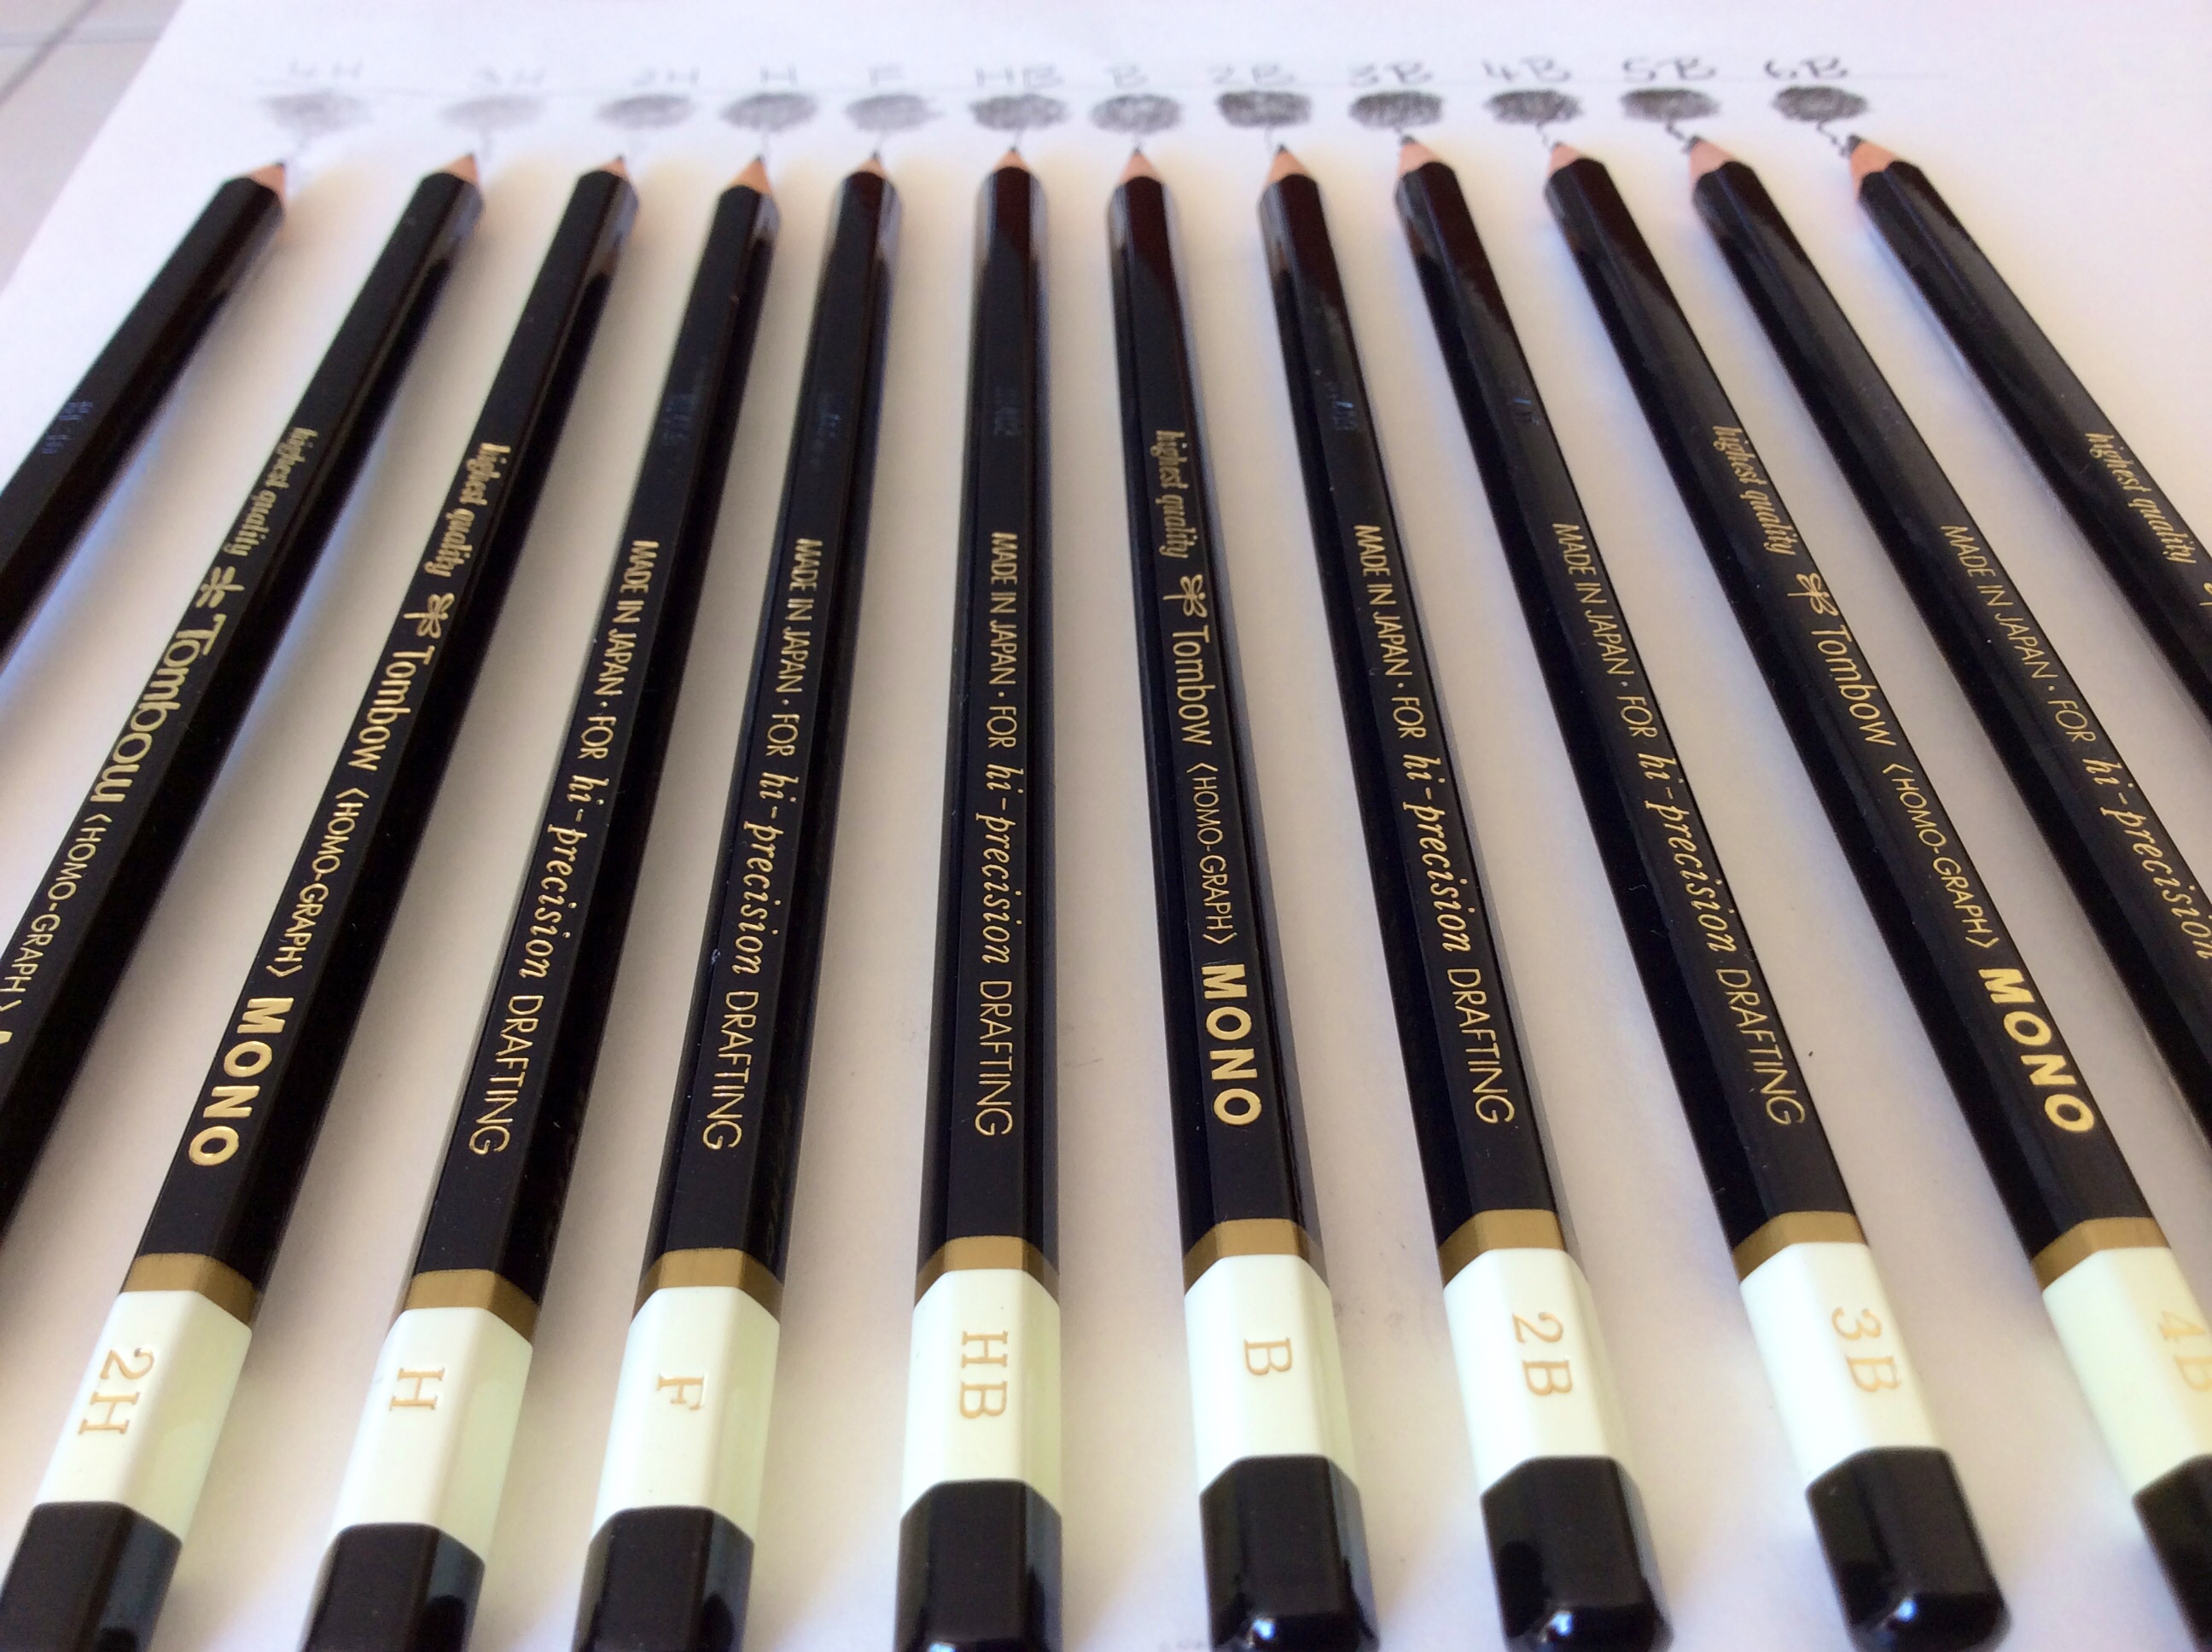
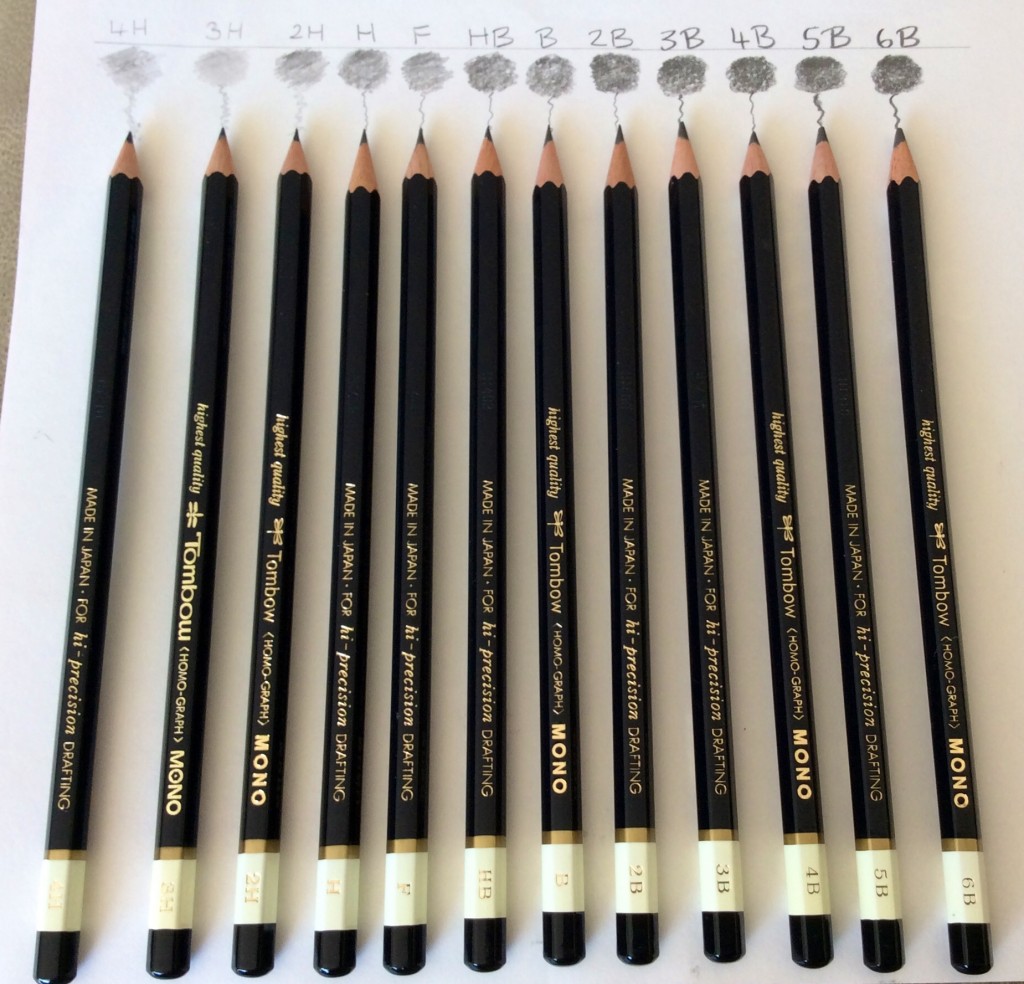
I’ve recently bought some Tombow Mono Pencils. They range from 4H to 6B but what do those numbers and letters mean?
Tombow Professional Drawing Pencils
Let’s find out in this quick Drawing Pencil Guide:-
The grading scale number first gives a clue of how hard the graphite in the pencil will be. The higher the number, the harder the graphite, and the lighter the mark will be on the paper. The higher the number, the darker the mark will be on the paper and the graphite in the pencil will be softer.
The second grading scale on the pencil is the letter. The letter H indicates a hard pencil whilst the letter B indicates the blackness of the pencil and a softer graphite pencil.
The letter F is the middle point pencil sitting between HB and H and has a very fine point. This pencil has a limited amount of graphite and more clay in the mixture.
A 4B pencil would be softer than a 2B and a 3H harder than an H.
Drawing Pencil Grades
Hard – 4H to 3H
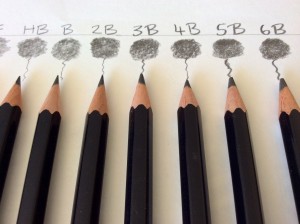
Medium Hard – 2H to H – This pencil makes light marks. It is good for drawing details and preliminary drawings that are not permanent Medium – F to HB Medium Soft – B to 2B – good for outlines
Very Soft – 5B to 6B – these pencils make dark softer marks. Soft – 3B to 4B
The B pencil is good for medium to light shading and the 2B for medium to dark shading. You can get more variety of shading from using the B pencils depending on the pressure used.
The H Pencil is hard and leaves a lighter mark on the paper.
B Pencils are softer and darker
The H pencil is the harder grade and is good for fine, light and some shading.
Did you know?
Leopards are nocturnal.
Male leopards are up to 50 per cent larger than females.
They don’t roar as loud as lions, but leopards can also purr.
King John kept leopards in the Tower of London in the 13th Century.
Leopards can take prey as large as antelopes, but will also eat dung beetles and other insects.
They are famously good at climbing up trees, and down – they often descend head first.
A male leopard can drag a carcass three times its own weight – including small giraffes – six metres up at tree.
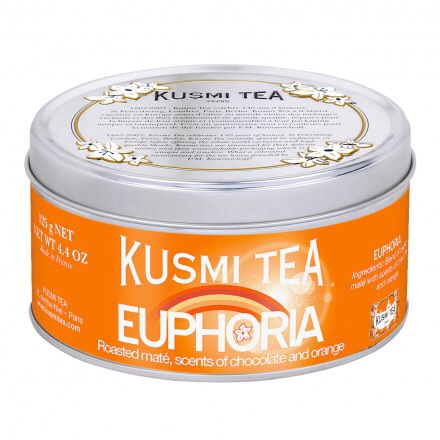
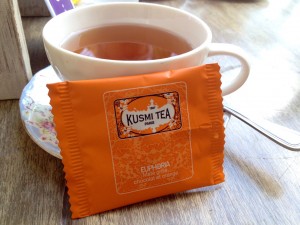
Today at breakfast I was offered a selection box of different teas to sample. I chose an orange packet called Euphoria by a company called Kusmi Tea.
Kusmi tea have been making tea for over 140 years but I’ve only discovered them today!
A very subtle Orange and Chocolate tasting tea.
Euphoria is a wellness tea and the flavor was very light but interesting.
It was a tasty blend of roasted maté, chocolate and orange. Euphoria is the perfect drink for a wellness-inspired teatime, but it can work at any time of the day except for maybe just before bed as it does contain caffeine.
Chocolate lovers can now indulge without feeling guilty.
The Orange and Chocolate flavor was blended with Roasted Maté.