A good photographer is a constant observer: always watching and studying a scene, from patterns in city traffic to movements in nature. A photographer notices big, sweeping changes — like the sky at dusk — but also the tiniest details.
Exploring the outdoors, with camera in hand, is an opportunity to look for natural lines that lead our eyes to different parts of a frame. Envision the bend of a stream, or the curve of a petal: how can you use these lines in your composition? If you see strong vertical, horizontal, or diagonal lines, can you play with the orientation to create a more dynamic composition?
The Natural World
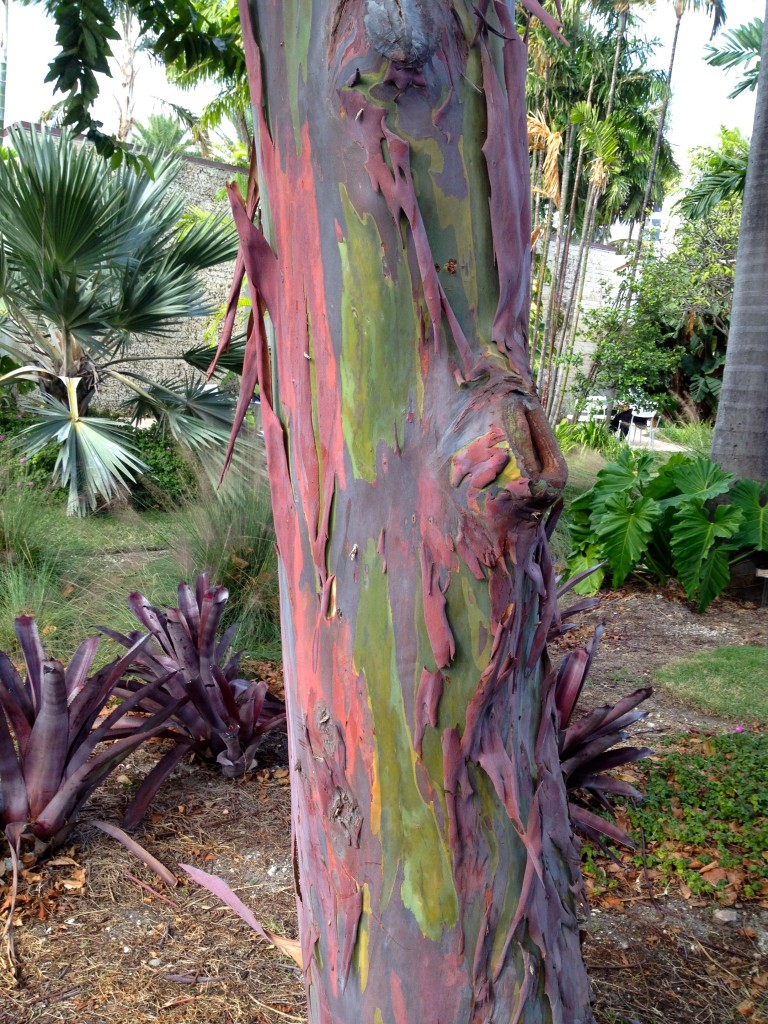
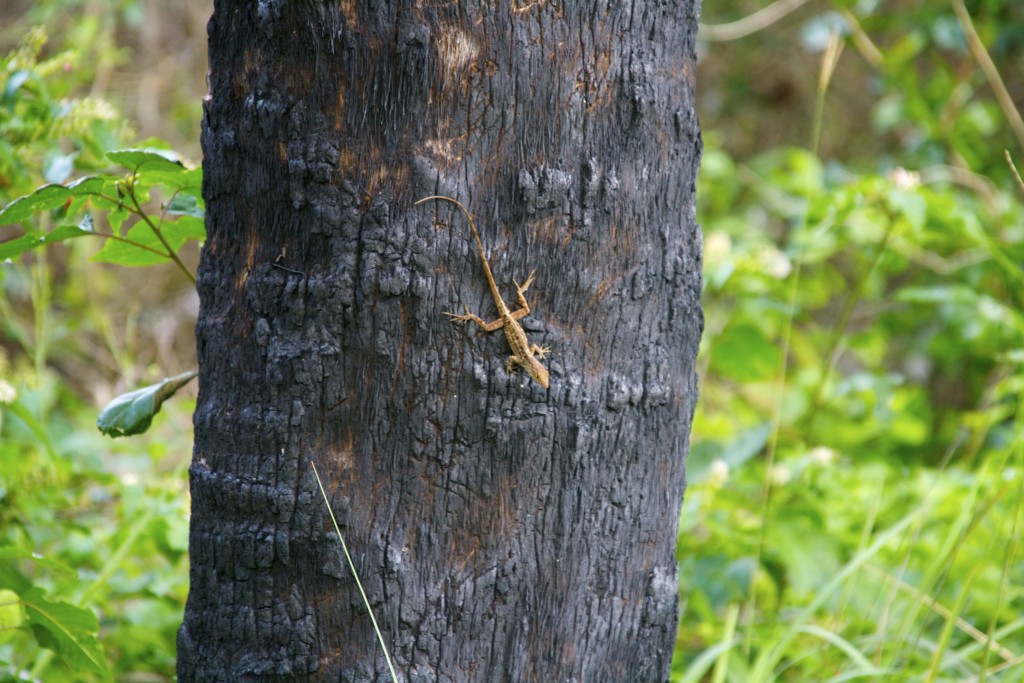
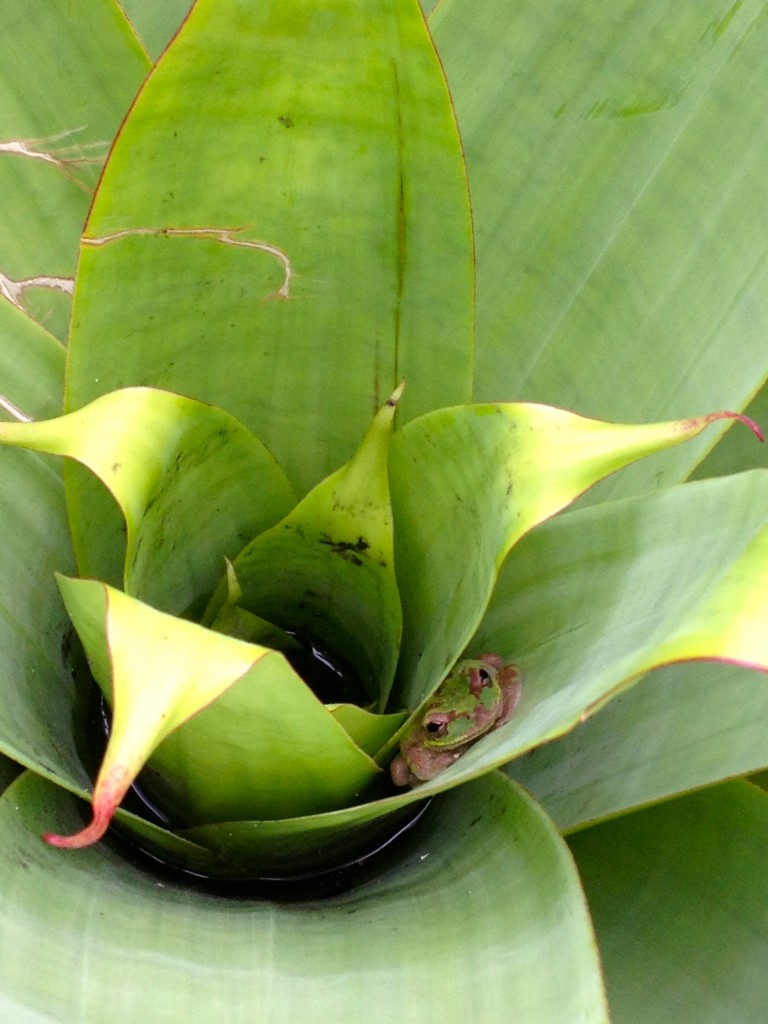
Rainbow Eucalyptus Tree has interesting Tree bark – Miami Botanical GardensA Lizard examining a burnt tree – Bill Baggs Cape Florida State ParkDid you spot the cheeky frog? He looks so comfortable in his own private oasis
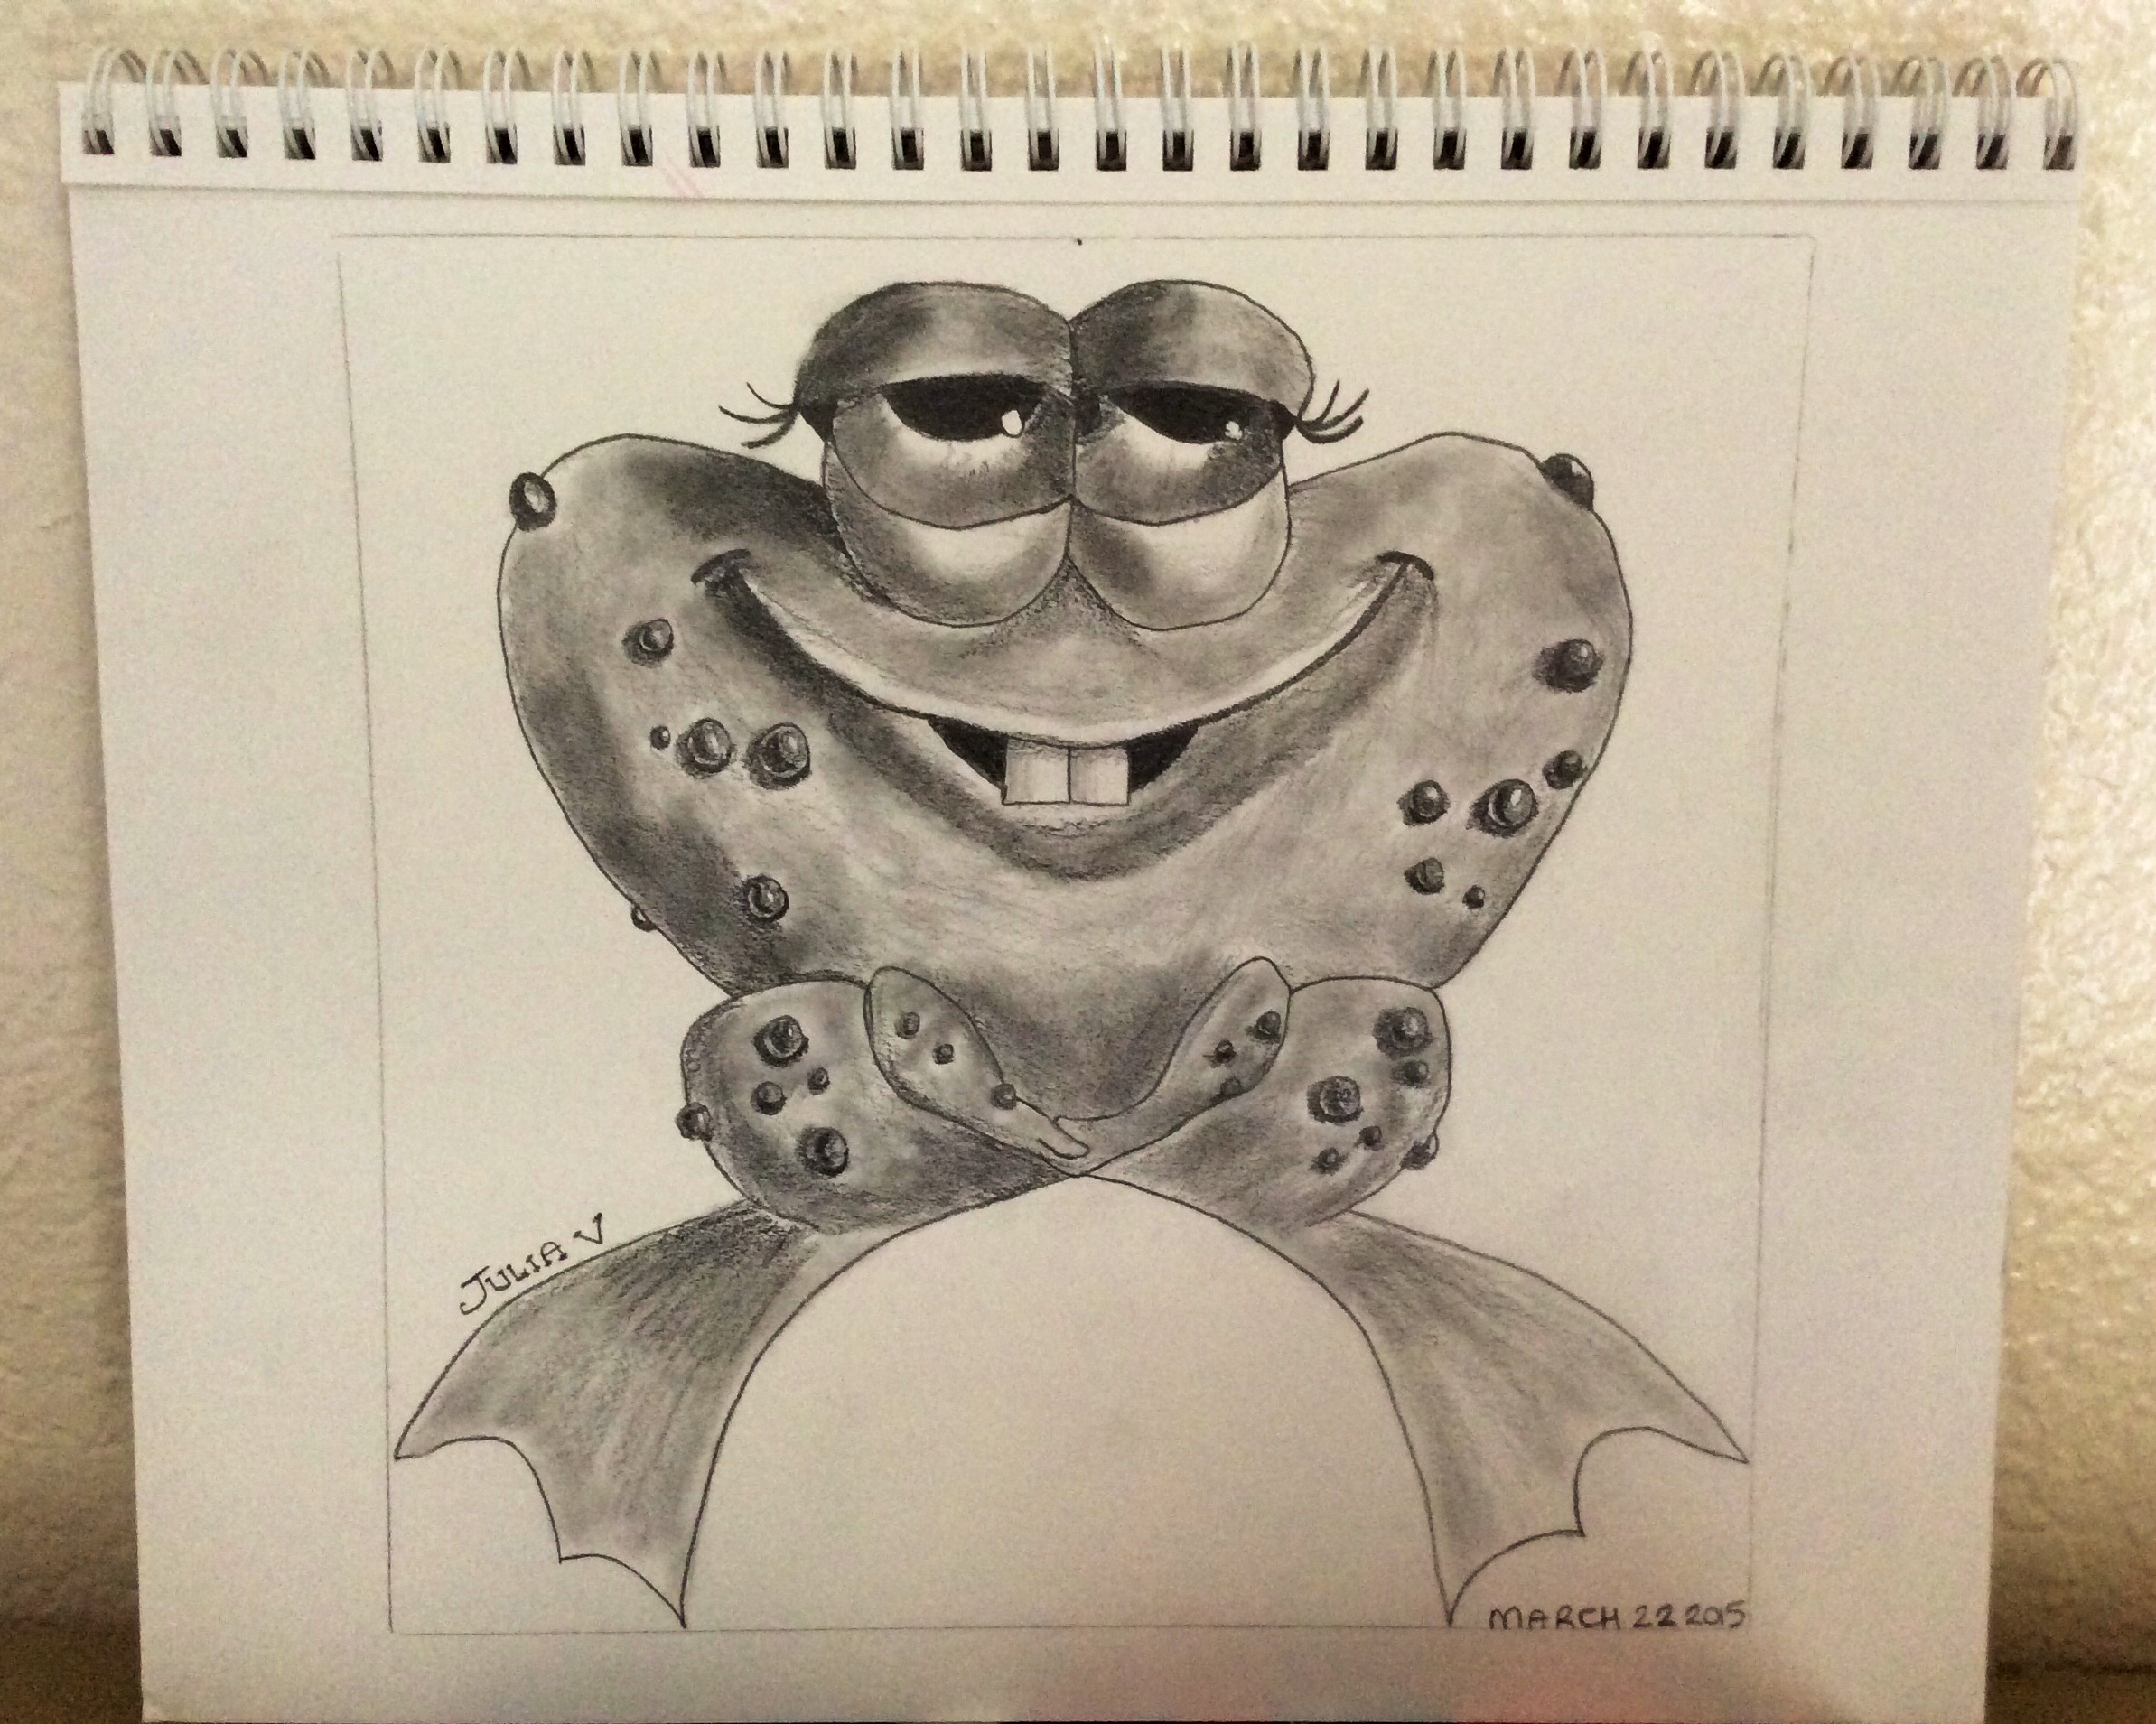
As part of my new feature series, Sketch Sunday, I will sketch a new drawing and explain how I made it. My first sketch is a comical looking frog.
For this sketch I used the following:-
Different grades of graphite pencils: 2H, HB, 2B, 4B and 6B
Strathmore Windpower Drawing Sketchbook
a kneaded eraser
pencil sharpener
Q-tip
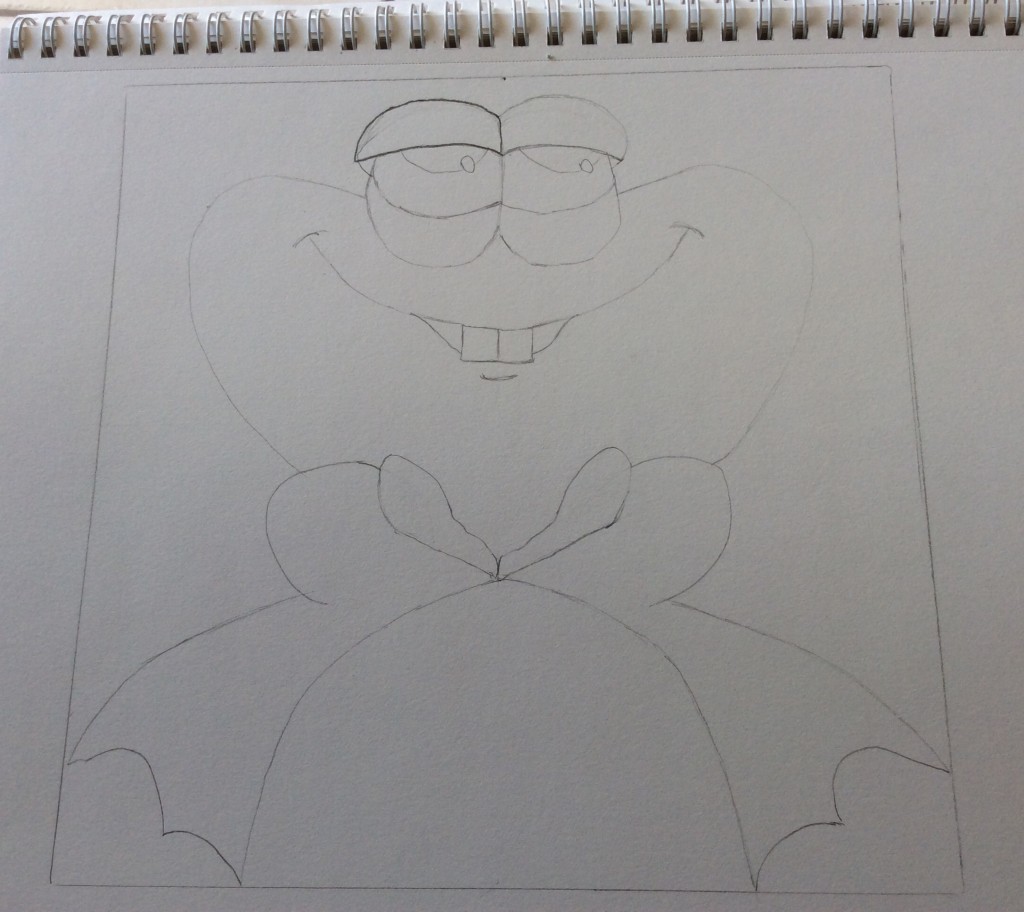
First I drew a square box on the paper to help contain the proportions of my sketch. I then drew a dividing line down the center as an aid to get the symmetry of the frog on either side.
I then drew the top half of his face and body and a couple of lines to mark where the legs and feet would go.
Roughly sketch the outline of the frog using a H pencil.
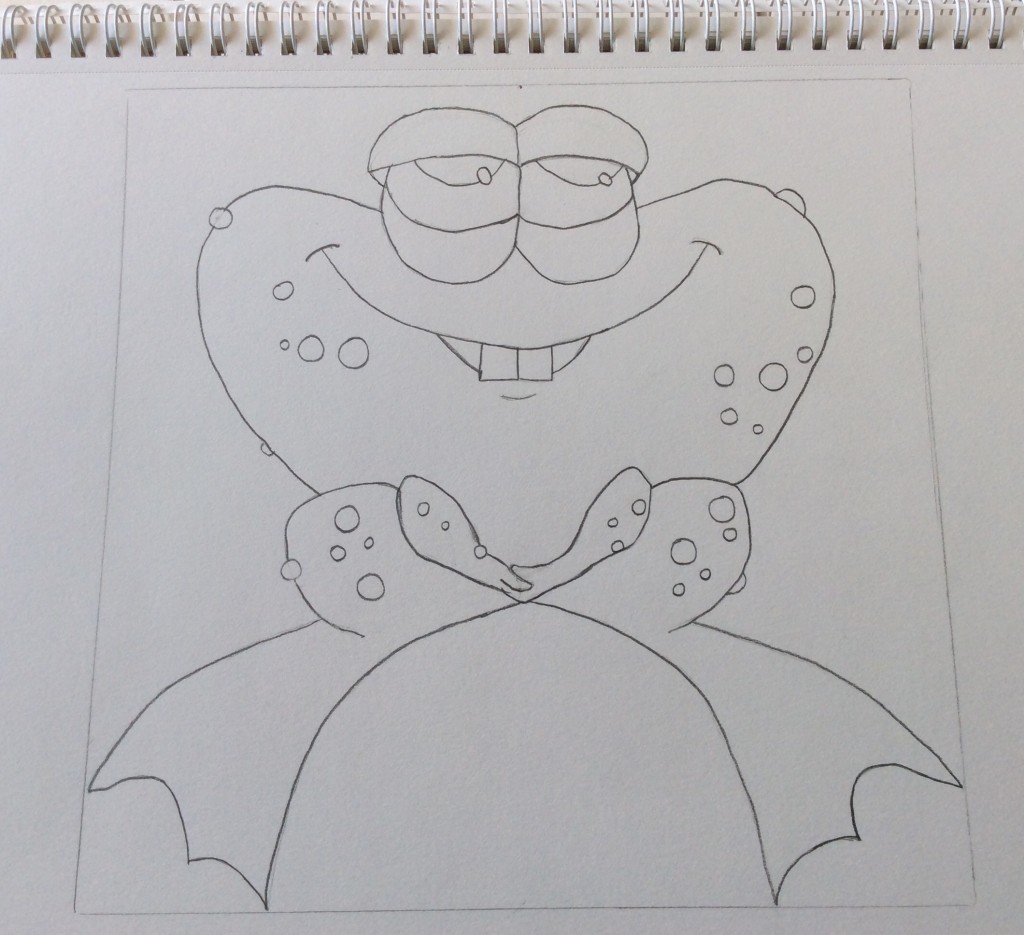
Two ovals become eyes. A slight curved line becomes a mouth with a couple of goofy teeth. I then erased all the guide lines and center marks so I was left with a plain frog sketch.
Next I used a 2B pencil to make some neat thin dark lines around the eyes, mouth and teeth. I then added some circles of different sizes that would become warts over his body. I finished off marking up the rest of the drawing with thin dark lines.
With a 2B pencil define the frog outline with a nice dark edge and add some different size circles to make warts on his upper body.
Next up is shading. First of all I used a HB pencil and added light shading to the frogs eyes, body, legs and feet. As I was shading I followed the contours of the lines, for example the curves in the eyelids. I continued in the same manner across the body and the legs with the darker shadows on the left and the lighter shadows on the right.